Probing for Part Inspection and Crash Avoidance
A reader uses “Ask an Expert” to explore various potential uses of the machining center’s probe.
Question
I am interested in using our machining center’s Renishaw probe both for inspecting parts, as well as for crash prevention by locating bolts or clamps. Do you have any advice?
Response from Dave Bozich, machine tool business manager with Renishaw
Using a probe for post process inspection is possible, but it’s a challenging issue. We generally suggest that customers keep their machines calibrated and properly aligned by using a laser interferometer, telescoping ballbar and other alignment equipment. We also suggest using strain gauge probes (such as Renishaw’s RMP600) vs. conventional kinematic probes. Strain gauge probes provide sub-micron repeatability. In addition, the use of a machine-resident artifact allows for correlation between the actual measurements taken from the part and the known dimensions of the artifact. PC-based data analysis software (Renishaw has OMV-Pro and CNC Reporter) may also be part of the solution.
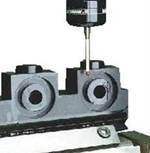
Regarding using a probe for crash prevention, that is much simpler. You will first need to determine if you are using Renishaw macro software or something provided by the machine tool builder. Renishaw’s Inspection+ software provides a "Protected Positioning" cycle. This is a canned cycle used when positioning from feature to feature within a probing cycle. If the probe is inadvertently tripped as a result of interference with a clamp, machine motion is stopped and an error is raised. If you are not using this software, see if the machine tool builder’s software offers a similar routine.
Related Content
-
Building an Automation Solution From the Ground Up
IMTS 2022 provides visitors the opportunity to meet with product experts to design automation solutions from scratch.
-
How to Calibrate Gages and Certify Calibration Programs
Tips for establishing and maintaining a regular gage calibration program.
-
Determining Out-of-Roundness at the Point of Manufacture
George Schuetz, Mahr Inc.’s Director of Precision Gages, offers these techniques for measuring roundness on the shop floor.


