Minimizing Turning Center Cutting Tool Touch Off
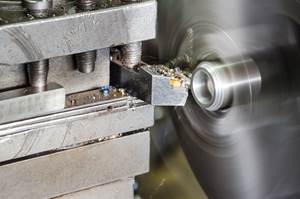
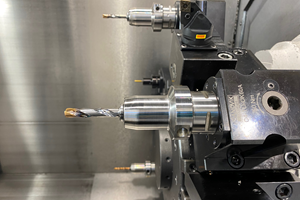
Turning center cutting tools vary from one type to another. When the turret rotates a cutting tool into position, the cutting edge of a turning tool will be in a different position than the cutting edge of a boring bar, a drill or a back-turning tool.
Turning center cutting tools vary from one type to another. When the turret rotates a cutting tool into position, the cutting edge of a turning tool will be in a different position than the cutting edge of a boring bar, a drill or a back-turning tool. Even with similar cutting tools—possibly even qualified tools such as turning tools—the cutting will not be in precisely the same position for each tool. Differences in tool shanks and inserts (and even the quality of placement in the turret) will result in a small deviation from tool to tool.
For this reason, turning centers require a separate program-zero assignment for each cutting tool. The accuracy of this program-zero assignment will directly affect how much trial machining will be needed when the first workpiece in a job is run.
I feel that the most accurate (and quickest) way of assigning program zero for turning centers is to use a tool touch-off probe. Although this device facilitates the task of program-zero assignment, many CNC turning centers don’t have a tool touch-off probe. If a center does have it, sometimes it is not used because people fail to see its benefit. This article assumes that you do not have or do not use a tool touch-off probe on your CNC turning centers.
Without a tool touch-off probe, the task of assigning program zero for cutting tools on turning centers is commonly referred to as “touching off” the tools.
I’m challenging you to a goal of completely eliminating tool touch offs for tools that remain in the turret from job to job. Many shops have accomplished this goal because it is achievable with most current models of turning centers. Eliminating touch off for these cutting tools should result in sizable savings.
Assuming that your programmer is using each coordinate in the program as the mean value of every tolerance band in every program, I contend that if a cutting tool is machining correctly in one job, it will continue to machine correctly in the next job. What could keep this from being true? Admittedly, if there is a dramatic difference in workpiece material from job to job (maybe from machining aluminum in one job to tool steel in the next), the tool pressure difference between materials will cause the need for sizing adjustments from job to job (not to mention the need for different insert grades).
Let me rephrase the question: What makes it necessary for your setup people to repeat the task of tool touch off for tools that remain in the turret from job to job?
For the X axis, the program-zero point is always the spindle center—the spindle center does not change from job to job. If a cutting tool is touched off correctly, and if the program zero assignment in the X axis is done correctly, diameters machined by the tool (even for the first workpiece) should be close to size. While tool wear will cause the need for sizing adjustments during the production run, when the production run is completed, and the tool is still machining properly to size, there will be no need to touch the tool off again for assigning program zero in the X axis for the next job. Even with a different workpiece configuration for the next job, the tool will continue machining to size (in diameter) when the next job is started.
Where is the program-zero point in the Z axis? Most programmers like to use the right end of the finished workpiece (the end opposite the chuck) as the Z axis program-zero point.
The trick is to find a more consistent Z-axis surface to use for Z-axis touch offs—a surface that doesn’t change from job to job. A good choice in many cases is the chuck face (we’re assuming the chuck isn’t replaced from job to job). Because the chuck face doesn’t change from job to job, there will be no need to repeat the task of Z-axis touch off for tools that remain in the turret from job to job.
What about the Z axis program-zero point? As stated, most programmers like to make the right end of the finished workpiece the Z axis program-zero point. If your setup people touch off the chuck face, does this mean all your programs must change?
Many current model CNC controls provide a way to shift the program-zero point, which means programs will not have to change. Programmers will determine the most logical program-zero point for developing programs, and setup people will be allowed to touch off a consistent surface.
For each job, the setup person will determine the distance from the chuck face to the Z axis program-zero point used by the programmer (right end of finished workpiece, for example). For the first operation of a workpiece, this isn’t overly critical. All that’s necessary is to ensure that material is left on the other end of the workpiece for the second operation. I’ve seen people measure this value with a dial caliper. For the second operation, this measurement is more critical. It controls the overall length of the workpiece.
Here is an example of how much this technique can save. Say there are five tools in your current job. The setup person touches them off and measures the work-shift value. The operator runs out the job. In the next setup, say the same five tools are used (no additional tools are required). In this case, only the work-shift value must be determined and entered.
Related Content
How to Tackle Tough Angled Pocket Milling With Two Tools
Milling a deep pocket with a tight corner radius comes with unique challenges, but using both a flat bottom drill and a necked-down finishing tool can help.
Read MoreChoosing Your Carbide Grade: A Guide
Without an international standard for designating carbide grades or application ranges, users must rely on relative judgments and background knowledge for success.
Read MoreForm Tapping Improves Tool Life, Costs
Moving from cut tapping to form tapping for a notable application cut tooling costs at Siemens Energy and increased tool life a hundredfold.
Read MoreWalter Extends Line of Precision Boring Tools
The new boring tools employ modular components such as cartridge holders and extensions, which are matched to the system, utilize an extensive range of indexable inserts suited for precision boring and can be used for all material groups.
Read MoreRead Next
The Cut Scene: The Finer Details of Large-Format Machining
Small details and features can have an outsized impact on large parts, such as Barbco’s collapsible utility drill head.
Read More3 Mistakes That Cause CNC Programs to Fail
Despite enhancements to manufacturing technology, there are still issues today that can cause programs to fail. These failures can cause lost time, scrapped parts, damaged machines and even injured operators.
Read More.png;maxWidth=970;quality=90)
.jpg;width=70;height=70;mode=crop)









.png;maxWidth=300;quality=90)


