The Value Of Probing On Turn-Mills
Part probing isn’t performed as often on turn-mills as it is on conventional machine tools. It does offer advantages for multitasking machines, though. Includes video.
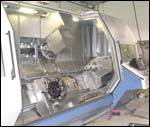
This M50 Millturn machine from WFL Millturn Technologies mills gear profiles, broaches internal splines and hobs external splines to complete a complex shaft component in one setup.
Turn-mills are attractive because they can oftentimes carry out all the operations needed to complete complex components like the shaft shown on the following page. In this case, an M50 Millturn machine from WFL Millturn Technologies turns journals, mills gears, drills holes, broaches internal splines and hobs external splines to complete the part. (The video to the right demonstrates these various operations.)
However, there’s a twist: This shaft must be hardened. And that means two setups are required. Roughing operations are performed prior to heat treating rather than having the turn-mill (or “millturn” as WFL refers to it) machine the entire workpiece in a hardened state. The workpiece must then be finish-machined on the M50 Millturn after it’s hardened. Although heat treating brings the workpiece to the specified hardness, it also slightly “bananas” the shaft. As a result, the part must be carefully measured once it’s reinstalled in the machine so that the program can be tweaked to compensate for the twisting distortion.
Manual measurement combined with subsequent program adjustments can take many hours for parts like this shaft that have complex features. However, WFL has developed canned probing cycles for its machines to automatically measure such parts and update the NC code for the finishing operations. For this workpiece example, a touch probe measures specific points on the gear teeth in the center of the shaft. In doing so, the gear’s pitch diameter is determined as is the true position of the gear centerline. The true position of the gear centerline is really what’s important. That’s because the machining code is automatically updated so all shaft features are machined to the gear’s true (measured) centerline, not the machine’s centerline. This ensures precise feature-to-feature accuracy after finish machining.
Related Content
-
How to Start a Swiss Machining Department From Scratch
When Shamrock Precision needed to cut production time of its bread-and-butter parts in half, it turned to a new type of machine tool and a new CAM system. Here’s how the company succeeded, despite the newness of it all.
-
Weiler to Debut New Automation Features For Its Lathes
Weiler’s V 110 four-way precision lathe introduces features new to the U.S.
-
When Too Many Customers Spoil the Part
Duo CNC used to take on as many customers as the shop could handle. But when growth stalled, a top-down audit by the company’s general manager revealed that its customer base was inhibiting growth — and causing the shop to be less efficient and productive.

.jpg;width=70;height=70;mode=crop)


.jpg;maxWidth=300;quality=90)


