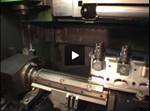
Video: Automatic Part Verification Through Reference Comparison
The machining center in this automated production process inspects its own work and updates its own positioning. Probing a known, traceable reference makes this possible.
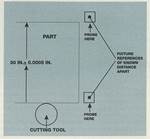
Here is a probing routine in which a machining center performs its own first-article inspection. The machine first probes a known reference to overcome measurement error. The difference between the known measurement and the measured value becomes the offset that will correct the probe measurement. This difference also serves as an offset for correcting the machining moves for the next workpiece in this setup.
This video was shot at Renishaw, and shows an actual part of the company’s automated production process. Renishaw offers these additional comments about the “reference comparison” or “artifact comparison” technique:
• The probe is calibrated against an artifact that has been calibrated at 20°C with uncertainty traceable to NPL.
• The artifact is the same material as the workpiece.
• It has geometry and features similar to the part.
• Comparative measurement gives traceability, and is independent of machine tool measurement accuracy.
• The part is measured using gaging points on the surfaces.
• Thermal effects determined from the artifact measurement are compensated when updating the process variables.
Related Content
-
How to Choose the Correct Measuring Tool for Any Application
There are many options to choose from when deciding on a dimensional measurement tool. Consider these application-based factors when selecting a measurement solution.
-
6 Machine Shop Essentials to Stay Competitive
If you want to streamline production and be competitive in the industry, you will need far more than a standard three-axis CNC mill or two-axis CNC lathe and a few measuring tools.
-
5 Things CNC Operators Must Know About Sizing Adjustments
For CNC operators, sizing adjustment is an essential skill. Keep these points in mind when training new CNC users.

.jpg;width=70;height=70;mode=crop)


