
Do's and Don'ts of Finishing Metal 3D-Printed Parts
Finishing 3D-printed parts requires different considerations than conventionally machined ones. One expert offers tips.

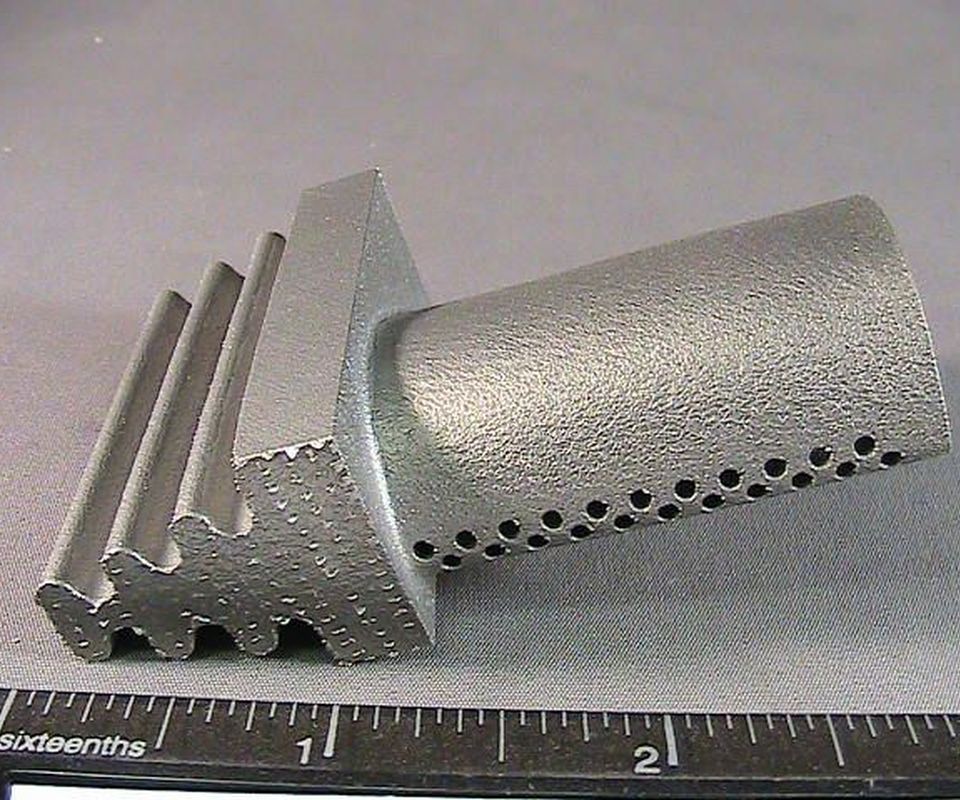
This first article of a sample air compressor blade is shown as-printed. Images courtesy of Bel Air Finishing.
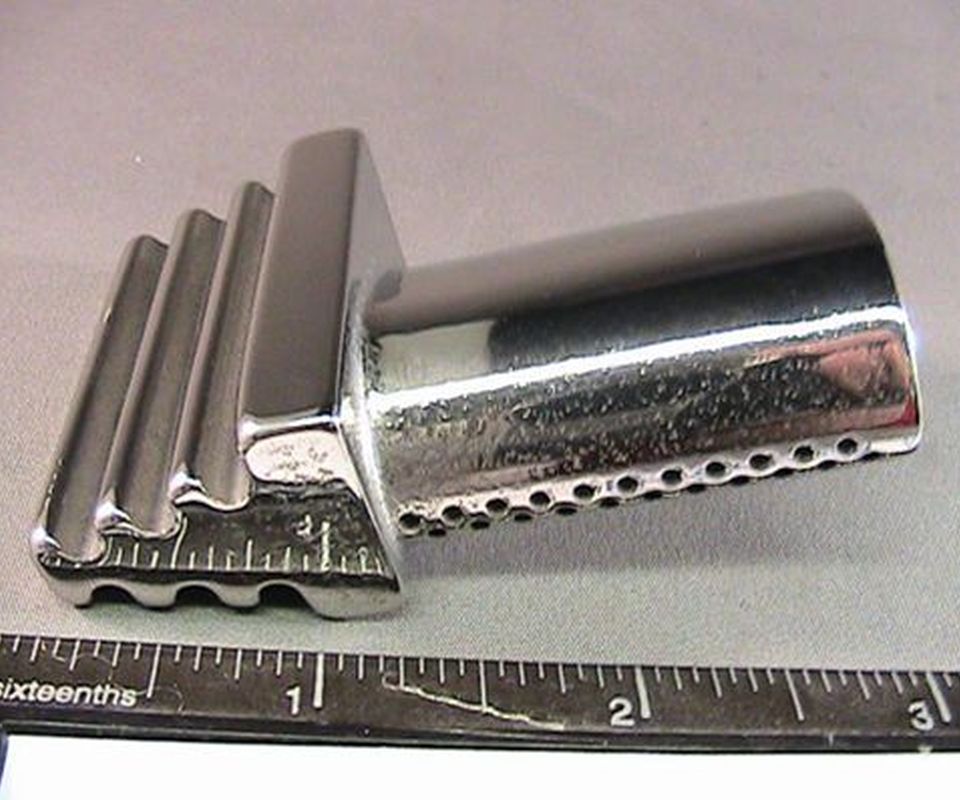
Here, the same blade is pictured following a superpolish postprocessing operation. Imperfections are visible on the leading edge of the profile.

This image shows a second article, built after the feedback loop. The air compressor blade was reoriented to avoid porosity after postprocessing.


3D printing offers production advantages by allowing parts to be made with more complicated geometries, fewer components and limited assembly. But many 3D-printed parts will need some kind of finishing work, and this presents challenges when it comes to achieving quality surface finish.
Steven Alviti, president of Bel Air Finishing Supply of North Kingstown, Rhode Island, offers the following tips for improving the surface finish of 3D-printed metal parts:


Do understand there is no one technology that suits all 3D printing finishing applications. The surface of the printed part is directly affected by the type of printer, the printing technology and the material grain size. Finishing technologies must be mixed and matched with each individual part design based on material, printing techniques and part geometry. It is also important to note that multiple techniques can be used on the same part.
Don’t design a part with a conventional manufacturing thought process. Chances are that there will be dimensional challenges and/or surface finishing problems when a printed part is integrated into its functional assembly. Corner, angle and surface geometries will probably need to be built in an unconventional manner. Loss of material at a surface, other than a corner, can range between 0.001 to 0.005 inch.
Don’t design a part with the 3D hype mentality. The hype suggests that you can take a five-piece assembly and turn it into a one-shot build with your printer. But considering surface finish requirements and understanding that conventional finishing methods will not be applicable may make it necessary to break down and simplify the design. For example, a one-shot build could be divided into a two-part build with a single assembly. This may allow for standard finishing techniques to handle dimensional requirements and still have a more efficient process of production.
Do use a technique that Alviti refers to as the feedback loop. Using expert finishing recommendations, print a first article part of a design. Then evaluate the dimensional tolerance, surface finish and any lost geometry. Next, feed this information back to the build design. This may entail adding extra material and sharper corners, breaking the design into multiple parts, or even adding what is called a mask. This is a breakaway structure that can protect a particular part geometry from extra material removal.
Do define your surface finish requirements before you choose your 3D printing method, technology and part design. A part prints with many different surfaces finishes, depending on its orientation with relation to the build plate, the position in the box and its own geometry. So, for the best surface finish, take into account the printing method and critical surfaces in orienting the part. Keep in mind that the speed of a build and the resulting surface finish are at opposite ends of the spectrum. For example, the lower the starting as-printed Ra, the more likely and faster you will achieve the required surface specification.
Do understand postprocessing finishing techniques. The finishing process should include an appropriate cleaning process as well as wet grinding for the gross surface smoothing operation. It is important to note, however, that wet grinding and other mechanical surface finishing methods require material removal; these effects must be fed back into the build geometry and orientation to compensate for the loss.
Do take the time to understand and experiment with whatever finishing methods you have available. Have some specifically designed shapes built in several machine technologies and then have the surfaces finished by conventional methods to analyze the results and limitations before you purchase or before you design a part.
For more detail and additional finishing examples, read this article from Additive Manufacturing, sister publication to Modern Machine Shop.


Related Content

5 Tips for Getting the Most From the Historic Return of North America’s Biggest Manufacturing Event
Plan. Explore. Think of the future. And oh yeah, the shoes. Here is how to get the most from the major manufacturing event that none of us have experienced in four years, and that many will be experiencing for the first time.
Read More
4 Ways 3D Printing Is Changing Medical Implants
Additive manufacturing provides new ways of making medical implants, but its impact is greater than this. How 3D printing is changing medical manufacturing and improving patient outcomes.
Read More
The Cool Parts Showcase Seeks Innovative 3D Printed Parts
Do you solve problems with 3D printing? Enter your 3D printed parts in this contest from The Cool Parts Show.
Read More
The Benefits of Vertically Integrating Metal 3D Printing and Machining
Having 3D printing and machining within one organization enables Addman’s engineers to collaborate and consolidate so it can quickly make successful metal 3D printed parts.
Read MoreRead Next


The Cut Scene: The Finer Details of Large-Format Machining
Small details and features can have an outsized impact on large parts, such as Barbco’s collapsible utility drill head.
Read More
3 Mistakes That Cause CNC Programs to Fail
Despite enhancements to manufacturing technology, there are still issues today that can cause programs to fail. These failures can cause lost time, scrapped parts, damaged machines and even injured operators.
Read More