Quality Precision and QVI
QVI proves their experience, functionality and precision in the Quality Pavilion at IMTS 2018
IMTS commences with an opening ceremony at the entrance to the East Building, often called the “Lakeside Center” by industry veterans. One of those veterans is Steve Flynn, President of the OGP group of Quality Vision International (QVI), which has been exhibiting at IMTS since the days of the National Machine Tool Builder’s Show held at the Chicago stockyards in the 1960’s. In addition to serving as president of OGP, Flynn is also Senior Vice President of QVI.
QVI is the world’s largest vision metrology company, producing a broad line of optical and multisensor coordinate measuring systems. QVI brands include OGP (Optical Gaging Products), RAM (RAM Optical Instrumentation), VIEW Micro-Metrology, CCP (Certified Comparator Products), ShapeGrabber, Itaca and Kotem—each is a leader in their respective markets. Quality Vision Services is the corporation’s dedicated service organization.
QVI traces its roots to the 1940’s, distributing optical comparators for brands such as Bausch & Lomb, Ex-Cell-O and Kodak. Later the company began to manufacture a full range of optical comparators and develop new technologies for automated optical measurement. They introduced the OGP SmartScope, the world's first benchtop video measuring machine, in 1991. OGP remains the industry leader with its full line of multisensor SmartScope systems in use by manufacturers around the world. QVI established its global headquarters and manufacturing campus in Rochester, New York, expanding considerably since that time.
“I don’t think that a lot of people, especially people just entering the industry, realize how much they can benefit from our depth of experience,” says Flynn. “Fortunately, tapping into that experience is as easy as visiting us in the Quality Pavilion in the East Building at IMTS 2018.”
QVI prides itself on its vertically integrated manufacturing operation, including complete in-house engineering design, optics fabrication, machining, electronics assembly, system assembly, software engineering and metrology application and integration services. All in-house capabilities enable QVI to react quickly, and with more flexibility, to customer requests.
QVI also prides itself on its experienced and dedicated people. One out of every five QVI employees has more than 30 years of service with the company, providing customers with a wealth of experience. QVI has also been hiring because of its growth. That growth necessitates investment in its facilities on the headquarters campus in Rochester, NY, most recently including doubling the size of the company’s large format systems assembly building in 2014 and its customer center showroom and training facility in 2016. A new building to house additional, large machine tools was added in 2017.
Breadth and Depth
“The opportunity to connect with experts and see such a wide range of metrology technology is a great reason to visit us at IMTS,” says Fred Mason, Senior Vice President of Marketing at QVI. “IMTS is important because it’s not simply about products. It’s about collaboration with customers about their measurement needs. We don’t just show canned demonstrations of our products. We’d rather a customer bring a part, print or problem, so we can measure that part or start solving their problem right on the show floor. That’s why we say QVI provides precision for people—it’s about what we can do for people in everyday manufacturing settings.”
Tom Groff, QVI's Vice President of Sales for North America, says that, “The moment at IMTS where I felt the most pride was helping an aerospace company. They had to measure a different part with different features every week. They were struggling because their existing metrology system required re-programming which took days per part.”
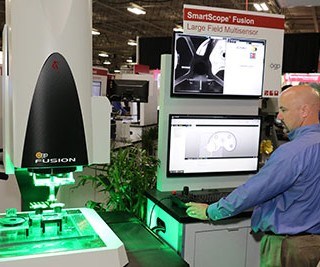
“The customer didn’t have a part with him, but we had a reasonably similar sample part at the booth,” says Groff. “I showed him our QVI Fusion 400 and demonstrated how the Feature Extraction function could analyze any part and display part geometry without the need for a programed measurement routine. He said, ‘Wow, that’s exactly what I need!’ I love it when they say that, and especially because we offered a solution he didn’t even know existed.”
Recent advances in optical systems developed by QVI for dimensional metrology include Large Field of View (LFOV) optical designs with the resolution and accuracy to allow measurement of numerous parts and features without stage or part motion, reducing total measurement time.
“We've dedicated a great deal of our optical engineering talent to large field-of-view optics,” says Gary Renz, Vice President of Engineering at QVI. “We are migrating LFOV optical systems into several different metrology platforms along with a range of other sensor configurations. Users gain the benefits of our industry-leading edge detection and image analysis for video measurement across a large field-of-view, achieving the measurement performance benefits of our high magnification, zoom-lens based systems.”
For example, the new QVI Fusion 400 has two internal optical configurations: a 100 mm field-of-view with a long depth of focus and a 20 mm field-of-view with autofocus. The user may switch between the two magnifications instantaneously with no change in datum reference or calibration.
Multi-sensors and Customization
QVI customers come from the automotive, aerospace, ceramic, clinical, electronic, semiconductor, plastics, biomedical, metalworking and other industries where tight tolerance parts require high precision inspection. The company has developed many different types of systems to measure parts made using many different processes and for different uses.
“Our customers need to verify the highly complex, multi-dimensional parts they make are within tight tolerances,” says Renz. “Multi-sensor technology enables users to apply a variety of inspection technologies to any one particular part in a single measurement routine. That minimizes the number of setups or the number of machines required for the measurement, increasing throughput.”
As an example, consider an orthopedic implant that has a complex shape and very tight tolerances. Optical measurement with a video sensor is good at measuring the intricate features that connect an implant to a bone or joint, while noncontact laser focus points excel at scanning the contoured surfaces. A trigger or scanning probe can be used to reach into spaces that cannot be accessed by optics or laser. By associating all measured points with the CAD model and product and manufacturing information (PMI), the implant manufacturer can be confident that the part meets the design intent and use the measurement results to make fast adjustments to the manufacturing process.
QVI excels at adapting the configurations of its standard platforms to meet the needs of each customer’s application. For example, to measure complex parts with a high density of small features, optical systems can be configured with several types of sensors and light sources oriented such that features of interest can be discriminated from similar features in close proximity to each other. In addition to a broad range of measurement systems, custom-engineered examples include tailoring the wavelength of light sources to better illuminate part features, or using unique combinations of sensors with manual and automatic fixtures and parts-handling systems to automate more of the measurement process.
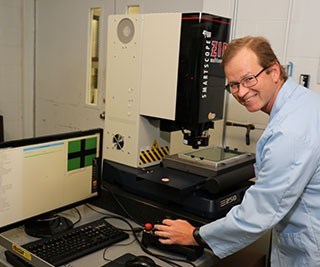
“We developed the SmartScope ZIP 635 multisensor system to provide high acceleration and velocity in three measurement axes, to enable the required throughput for large part inspection,” says Renz. The SmartScope ZIP 635’s high speed moving bridge design allows the part being measured to remain stationary while the transport moves the sensors around it. This offers significantly faster throughput compared to other system designs which move parts underneath a fixed sensor, making it much more productive and cost effective.
“When you purchase a measurement system from QVI, rest assured that the technologies, the resources behind those technologies, and local support are available to you on a global basis,” says Flynn. “We can assure your success with your application because we analyzed the application before recommending a system.” Mason adds that, “Our own vertical integration means that we truly understand a customer’s metrology needs from within their manufacturing context.”
Flynn notes that QVI actively sells to more than 70 countries and that QVI only sells in locations where it can provide after-sale support.
Quality Experience at the IMTS Quality Pavilion
With metrology technology advancing rapidly, attending IMTS provides an unmatched opportunity to find the exact solution to measurement challenges. QVI will bring more than 30 of its advanced metrology systems to the show, demonstrating a full range of capabilities and price points to satisfy the needs of advanced manufacturers across industries.
Flynn emphasizes that QVI’s broad product portfolio is the result of intense customer focus. “As customers interact with QVI engineers, as they have done for more than 70 years, it continuously leads to new product developments that solve the newest measurement problems.”
“That’s another example of what we mean by precision for people,” states Mason. “If dimensions, precision and your reputation for quality products are important, please visit us in the Quality Pavilion at IMTS. QVI will have 50 of our brightest people at the show for one reason: solving your measurement challenges.”
Enjoy this article from the IMTS Insider Newsletter? Subscribe here.
Related Content
Don't Miss This: Technology Trends
Manufacturing advances like automation and machine monitoring software are not only affordable for job shops, they may soon become competitive necessities.
Read MoreCombination Lathe Enables Both Manual, CNC Operations
IMTS22: Milltronics showcases its ML16II/40 combination lathe, as well as its VM3018IL performance vertical machining center.
Read MoreWeiler to Debut New Automation Features For Its Lathes
Weiler’s V 110 four-way precision lathe introduces features new to the U.S.
Read More2022 Top Shops Honorees Announced
Modern Machine Shop recognizes excellence in manufacturing with annual Tops Shops awards.
Read MoreRead Next
The Cut Scene: The Finer Details of Large-Format Machining
Small details and features can have an outsized impact on large parts, such as Barbco’s collapsible utility drill head.
Read More3 Mistakes That Cause CNC Programs to Fail
Despite enhancements to manufacturing technology, there are still issues today that can cause programs to fail. These failures can cause lost time, scrapped parts, damaged machines and even injured operators.
Read More.png;maxWidth=970;quality=90)


.png;maxWidth=300;quality=90)

