
Building Your Own Calibration Process
Tailor your procedures, but conduct them regularly, to keep your measuring equipment working properly.


George Schuetz
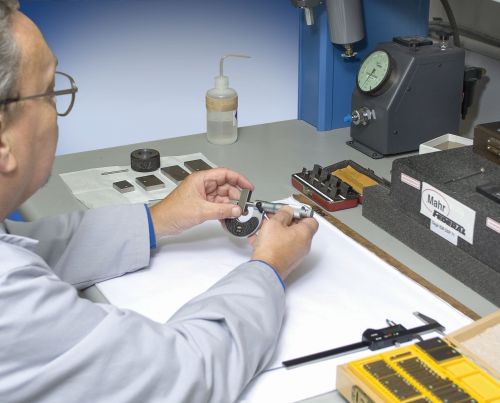
All gaging equipment must be checked periodically to ensure that it can measure parts accurately.


All gaging and measuring equipment must be checked periodically to ensure that it is capable of the job it was intended to do—to measure parts accurately. In the vast majority of cases, this simply involves verifying that these calipers, micrometers, and test and dial indicators meet their performance specifications. In others, it requires adjusting their performance to meet specifications. But in any case, this process of calibration needs to be done on a regular basis.
Ideally, gages would be checked before and after every measurement to ensure that nothing changed between the time the gage was last calibrated and the time it was used. This scenario is not practical, however, and, in most cases, modern gages are very reliable and do not vary much in their day-to-day use. (Unless, of course, the gage gets dropped or is used as a hammer to adjust a machine tool.)
For large and medium-sized companies that employ hundreds of gages, the question often becomes whether to perform calibration in-house or to use a contracted calibration facility. Owning a large number of gages involves a large investment, not only in the one-time costs of purchasing the gages themselves but in the recurring costs associated with calibrating them. How to calibrate is a decision that needs to be looked at closely.
For the very small shop, however, hand tools and gages can be calibrated perfectly well and that calibration documented properly right in-house. To comply with various ISO standards, such a shop needs to: have a good set of dimensional standards (gage blocks); understand the gage performance standards; identify each gage with an individual serial tag; have a written calibration procedure; and document that process and keep records of results. The shop also must repeat the calibration process at regular and controlled intervals.
Whether the gage is a caliper, micrometer, or dial or test indicator, the basic calibration process is the same. It starts with a calibrated standard, which usually involves a set of certified gage blocks, although those gage blocks don’t have to be of the highest grade for basic, lower resolution tools. An inexpensive set with proper certification can be a good basis for a calibration process.
Gages are generally made to national or international standards. You can determine testing criteria either from the standard or the manufacturer’s specification. These performance specifications will be the core of any documented calibration procedure you build.
This documentation should include: the tools for performing the calibration; how and where the process will be conducted; the performance criteria; and who will perform and witness the tests. It’s also a good idea, as part of the starting process, to make a list of potential sources of error that could reduce gage performance. The process should include a general inspection of the gage to make sure it’s working well and has no obvious damage or worn components, that the points are secured in place, and that the gage is properly attached to the test fixture. Those performing the test should be sure the gage is perpendicular to the test fixture to reduce cosine error, and that all items are clean and free of dirt.
Gage identification also is a simple but critical part of the calibration process. Having a unique individual tracking label or permanent marking on the gage is key. With this and properly filed test results, a shop will have the historical information required to demonstrate that the gage is “under control” within its calibration process.
Finally, the shop should determine the best calibration cycle for a particular gage. The natural inclination always seems to be to calibrate annually, but often this may not be the best choice for eliminating the potential risk of bad measurements, or the most economical choice. The best way to think of it is to have the calibration time period tied to the critical nature of the measurement task and how often the gage is used. If the gage is used on the shop floor, in a dirty environment for precision parts, calibration might need to be a monthly process. On the other hand, a gage that is used once a month or less might go to a 12- or 18-month calibration cycle. Monitor the process once you start, and it can easily be made longer or shorter as needed.


Read Next

3 Mistakes That Cause CNC Programs to Fail
Despite enhancements to manufacturing technology, there are still issues today that can cause programs to fail. These failures can cause lost time, scrapped parts, damaged machines and even injured operators.
Read More
The Cut Scene: The Finer Details of Large-Format Machining
Small details and features can have an outsized impact on large parts, such as Barbco’s collapsible utility drill head.
Read More