Published
Measurement System Analysis: Using the Data
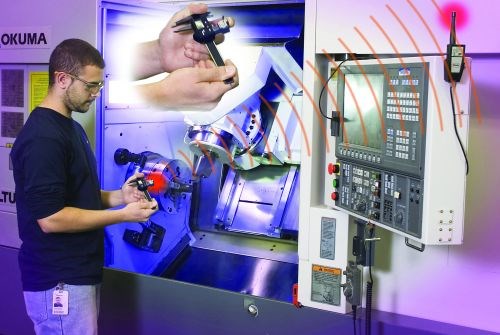
High-end transducers are available for precision dimensional measurement. These electronic systems can provide incredibly high resolution and accurate readings, but they are also able to transfer data to a data collection device, usually a computer.
In the past, manual data collection and analysis was considered the best method because the operator was involved, which helped him or her understand the process and its important benefits. However, many “canned” statistical tools are available today, so it makes more sense to put these tools to use and collect data electronically.
Manual charting is tedious, time consuming and subject to error. When an operator measures and records manually, he or she has two chances for error: observing and recording wrong. With electronics, the operator simply measures and presses a switch. In any case, gages still provide the operator with an on-site reading to monitor the process and make decisions based on the tolerance of the part.
There are a number of different reasons for collecting data. The first is to document part results, which are required for some critical medical, aerospace and military parts. This information can be used later to verify that the part was inspected and found to be within specification. Whenever there are life-critical parts, result documentation is probably required.
Data collection is also useful for determining if a part lot should be accepted or rejected. Typically, a sampling plan is used to qualify the lot of manufactured parts, and many tools are available to help do this. Plotting the data in a histogram against the tolerances is a good, visual way to review the data. Statistical techniques offer numerous calculations in order to project the percentage of parts within tolerance, determine the spread of the data and forecast how “normal” the manufacturing process is. The correct method for making decisions about the data depends on the quantity of parts, how confident the operator needs to be about the results and the critical nature of the dimensions. The sampling could be done either after the lot of parts is run or as an incoming inspection process for receiving parts. These sampling plans for received material can be kept not only by part and dimension, but also by vendor to help qualify the quality levels of a supplier.
Perhaps the best-known use for collected data is for statistical process control (SPC), the in-process analysis of parts as they are being produced. By using X/R, range charts and other sampling techniques, parts are measured at some preset sequence to monitor the process. The goal is to monitor the machining process in a way that prevents bad parts from being made. In any machining process, there tends to be slow shifts over time. Influences such as tool wear or temperature can affect the process. By monitoring the process as it is going on, adjustments can be made to improve its performance.
In addition to analyzing the data for part quality purposes, measurement data can be used to improve the manufacturing process itself. When new parts and processes are being developed, a critical factor is determining how many good parts the process yields. Nothing is more costly to a manufacturer than producing non-conforming parts. By systematically monitoring part data, manufacturers can learn what parts of the process affect which part dimensions. Also, decisions can be made to adjust or alter the process to improve both the part quality and the process yield.
Finally, I usually talk about very precise gaging for tight tolerances. It’s important to have the correct gage for the job in terms of gage performance compared to tolerance, operator ease of use, consistent reading between operators and short- and long-term repeatability and stability. That’s where a Measurement System Analysis (MSA) comes into play along with GR&R studies. The MSA separates all these measurement components, making it easy to determine how well the gage will perform for the job.
These are the most common uses for collecting part quality data, but there are more. It’s easy to collect data. The amount, however, can be staggering. What is important is to focus on problems of the process and collect data when it can make a difference.
Read Next
Vertical Machining Centers
The Cut Scene: The Finer Details of Large-Format Machining
Small details and features can have an outsized impact on large parts, such as Barbco’s collapsible utility drill head.
Read More3 Mistakes That Cause CNC Programs to Fail
Despite enhancements to manufacturing technology, there are still issues today that can cause programs to fail. These failures can cause lost time, scrapped parts, damaged machines and even injured operators.
Read More


.png;maxWidth=300;quality=90)


