The Real Dirt About Gaging
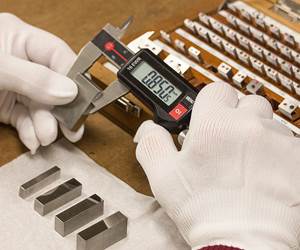
I'm not sure that any of us in the metrology business are very close to godliness, but I do know that cleanliness is the first step to approaching accuracy in gaging. Probably every machinist is at least nominally aware that dirt can interfere with the ability to take accurate measurements.
I'm not sure that any of us in the metrology business are very close to godliness, but I do know that cleanliness is the first step to approaching accuracy in gaging. Probably every machinist is at least nominally aware that dirt can interfere with the ability to take accurate measurements. But the importance of the issue cannot be over-emphasized, and even a conscientious user occasionally needs a reminder.
Here's a quick reality check: Leave your gage out of its box for a few hours. Then check it for zero setting. Next, clean the measuring surfaces, blow off the lint, and check the zero setting again. You will probably find a difference of about 0.0005 inch due to dirt on these surfaces.
We left a clean master disc, marked 0.7985 inch XX, unprotected for a number of hours on a workbench in the shop. Then, taking special pains not to touch its measuring surfaces, we brought it into a temperature controlled room and let it cool off before measuring it with an electronic comparator. The needle went off the scale, which meant that the master plus dirt was more than 0.0003 inch larger than the nominal 0.7985 inch setting. Then we carefully and thoroughly cleaned the master with solvent and measured it again. The reading was +0.000004 inch from nominal.
Finally, we cleaned the master again, using the time-honored machinist's method of wiping it with the palm of the hand. Measuring again, it had gone up to +0.000013 inch. We lost half the normal gage tolerance by "cleaning" it with the palm. (Some slight error may also have been introduced through expansion of the master due to conductive heating from the hand. More on this subject in a later column.)
We have already seen how dirt in invisible quantities can skew a measurement, both on the contacting surfaces of the gage itself and on the workpiece or master. And recall that our examples were reasonably clean environments. Now picture the common abode of a gage in your shop: Is it living in an oil-and-chip-filled apron of a lathe or screw machine, or perhaps sharing the pocket of a shop apron with pencil stubs, pocket lint and what-have-you?
Aside from simply getting in the way of a measurement, dirt also impedes accurate measurement by increasing friction in a gage's movement. Drag may prevent a mechanism from returning to zero, and every place that friction must be overcome represents a potential for deflection in the gage or the setup. If dirt is the biggest enemy of accurate measurement, then friction is a close second.
The next time you have a service technician in the shop to work on a gage, watch this person carefully. Chances are, the first step is to clean the gage, whether it is a simple dial indicator or a coordinate measuring machine. If you take away only one thing from this column, this should be it: Eliminate dirt as a possible source of error before attempting to diagnose a malfunctioning gage.
Related Content
How To Calibrate Your Calipers
If you’re interested in calibrating your own digital, dial or Vernier calipers, here are some steps to take to make sure it goes off without a hitch.
Read More4 Ways to Establish Machine Accuracy
Understanding all the things that contribute to a machine’s full potential accuracy will inform what to prioritize when fine-tuning the machine.
Read MoreHow to Choose the Right Cut Off When Measuring Roughness
Measurement results for surface finishing parameters can vary depending on the filter parameter (Lc), also known as the cutoff.
Read MoreHow to Calibrate Gages and Certify Calibration Programs
Tips for establishing and maintaining a regular gage calibration program.
Read MoreRead Next
The Cut Scene: The Finer Details of Large-Format Machining
Small details and features can have an outsized impact on large parts, such as Barbco’s collapsible utility drill head.
Read More3 Mistakes That Cause CNC Programs to Fail
Despite enhancements to manufacturing technology, there are still issues today that can cause programs to fail. These failures can cause lost time, scrapped parts, damaged machines and even injured operators.
Read More


.png;maxWidth=300;quality=90)


