7 Suggestions for Process Documentation
Drawings that include these seven details can help clarify specific operations.
Companies that run the same jobs over and over often go to great lengths to engineer exactly what must happen on the manufacturing floor. CNC setup people and operators in this kind of company may not work from design engineering drawings. Instead, a manufacturing engineer provides a process drawing and related documentation that limits content to a given operation, machine or manufacturing cell. The engineer will do this for each operation/cell involved in producing a workpiece to completion.
If an operation involves lathe machining on a turned workpiece, for example, only turned workpiece attributes will be dimensioned and documented. Workpiece attributes machined by other machines/cells will not be detailed.
A huge amount of clarifying information can be included on a process drawing. For example, a process engineer can precisely identify machined surfaces and the cutting tools that machine them. He can provide quality control information used for gaging and can relate specific (sizing) adjustments to the CNC methods used to adjust them. This kind of information is never included on a design engineering drawing.
In my experience, process drawings tend to have a biased emphasis. If a quality control person develops them, the emphasis may be on gaging. If a CNC programmer develops them, the emphasis may be on making sizing adjustments. If a tooling engineer develops them, the emphasis may be on cutting tools and workholding devices. Shopfloor people who actually use the process drawing rarely have a say. When developing the template for your process documentation, be sure to involve everyone who plays a part in your manufacturing environment. Only then can you ensure that you don't forget something important. Here are my suggestions:
1. Identify machined surfaces. This information is especially helpful for entry-level workers when machining operations have been previously performed on the workpiece. One may not be able to identify what the machine has done by simply looking at a completed workpiece. And, as I’ll show, the method for identifying machined surfaces often leads to further clarifying documentation.
One effective method is to use a color-coding system. Mark surfaces that have been machined by different cutting tools using different colors. In a color-code legend table, correlate each surface with information about the cutting tool used to machine it, like station number and offset number, as well as each of the details suggested below.
2. Provide target values for adjustments. Be consistent with dimension/tolerance specifications on the process drawings/documentation, and make them as simple to interpret as possible. I recommend providing three values for each: the low limit, the target value needed when a sizing adjustment is required (often the mean value of the tolerance band) and the high limit. This will keep workers from having to calculate tolerance values, which in turn will save time and minimize the potential for mistakes when measuring workpieces. For a dimension and tolerance of 4.255 inches ±0.002 inch, for example, and assuming you want your people to target the mean value, specify the dimension for the workpiece attribute as 4.253/4.255/4.257.
3. Specify the workpiece attributes to measure. Often, multiple workpiece attributes are machined by a single cutting tool, yet only one adjustment affects them all. Pick and identify the most critical of them (per adjustment) for measuring, and specify it in the process documentation.
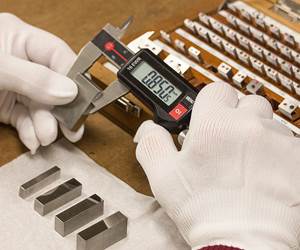
4. Specify the gage needed for each measurement. For variable gages like micrometers and calipers, it may be enough to simply specify the gage name (a 0-1-inch micrometer, for instance). For special fixed gages, be sure to also specify the gage number. If special or unusual gaging techniques are required, be sure to document them. Depending on the skill level of your workers, it can help to include additional measuring instructions, perhaps incorporating a photograph or video.
5. Specify measurement frequency. Be sure to prescribe how often inspections must be done, usually in terms of number of completed workpieces.
6. Trend information. Certain workpiece attributes, and especially those machined by single-point cutting tools on turning centers, will grow or shrink during the cutting tool’s life (due to tool wear). With trending workpiece attributes, be sure to specify the action point. It should take into consideration the measurement frequency so as not to allow workpieces to trend out of tolerance between measurements. Say, for example, you specify the action point at 20 percent of the overall tolerance. When a workpiece attribute having an overall tolerance of 0.004 inch grows or shrinks within 0.0008 inch of a tolerance limit, the operator is expected to make a sizing adjustment.
7. Specify the adjustment method. Be sure to tie each workpiece attribute requiring an adjustment to the manner by which the adjustment must be made. If a cutting tool must be physically adjusted (like a boring bar used on a machining center), be sure to specify as much. If a CNC offset adjustment is required, specify the offset number and type. For example, if a turned diameter attribute is being machined by a finish turning tool using offset number 3, specify that it is the X-wear register for offset number 3 that provides the adjustment. This will keep workers from having to know/remember which cutting tool machines each workpiece attribute.
Related Content
How To Calibrate Your Calipers
If you’re interested in calibrating your own digital, dial or Vernier calipers, here are some steps to take to make sure it goes off without a hitch.
Read MoreChoosing The Right Grinding Wheel
Understanding grinding wheel fundamentals will help you choose the right wheel for the job.
Read MoreSelecting The Right Welder
Many machine shops, on occasion, have a need for welding. It may be for maintenance purposes, repair or to fill the odd contract. This story is a welding process primer for those shops whose main business isn't welding but need to know some basics.
Read MoreA New Milling 101: Milling Forces and Formulas
The forces involved in the milling process can be quantified, thus allowing mathematical tools to predict and control these forces. Formulas for calculating these forces accurately make it possible to optimize the quality of milling operations.
Read MoreRead Next
3 Mistakes That Cause CNC Programs to Fail
Despite enhancements to manufacturing technology, there are still issues today that can cause programs to fail. These failures can cause lost time, scrapped parts, damaged machines and even injured operators.
Read MoreThe Cut Scene: The Finer Details of Large-Format Machining
Small details and features can have an outsized impact on large parts, such as Barbco’s collapsible utility drill head.
Read More
.jpg;width=70;height=70;mode=crop)


.jpg;maxWidth=300;quality=90)

.jpg;maxWidth=300;quality=90)


.png;maxWidth=300;quality=90)


