Probing Feedback Keeps CNC Machining On Track
CNC machine tools that operate like self-contained, automated smart factories can be an introduction or an addition to digital manufacturing workflows.
Opportunities for machining automation can extend beyond moving or handling parts. When the application is right, using feedback loops between measuring devices and CNCs for automatic, in-process corrections can bring the promise of the interconnected shop floor down to the level of the individual workzone. Add functions such as automatic report generation, and these systems operate like miniature, self-contained “smart factories,” where traditionally siloed production and quality control processes merge. As such, self-correcting feedback loops could be implemented, either as an introduction to data-driven workflows or as an addition to already digitalized shop floors.

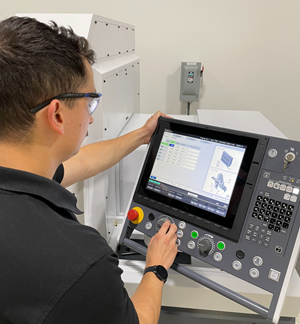
CappsNC translates measurement programs to G code to enable more complex measurements than would otherwise be possible. Image Credit: AAT3D
My most recent exposure to self-correcting machining techniques was courtesy of Applied Automation Technologies (AAT3D). This software developer’s CappsNC system, which uses spindle-mounted measuring devices in regular cycles of “measure, cut, measure” to ensure machining proceeds exactly as planned, was first released in 1993. However, CNC feedback loops seem to be a better fit for the manufacturing floors of 2021, where overall production is also beginning to resemble a loop rather than the traditional line. Applying the same underlying concepts at the level of the individual machine tool — that is, using feedback from disparate production stages to iterate process and product improvements faster — can reduce the overall number of operations and, by extension, compress dataflows. Consolidated shop-wide datasets might yield insight more easily.
With or without a shop-wide dataset to analyze, implementation is said to be straightforward. A computer loaded with the software hooks directly to the machine tool CNC via an ethernet cable. Using spindle-mounted probes, lasers, CCD cameras or other noncontact sensors, the software calculates and feeds compensation data to the CNC for automatic updates to the part program. Work offset, tool offset and dynamic tool compensation (including tool pressure error) adjustments adapt the G code to variation in the machining process (for example, when geometry does not match the CAD file, as might be the case with sheet metal, composite parts or 3D-printed parts).
The software works by translating coordinate measuring machine (CMM) programs to G code, and CMM programs offer advantages beyond keeping CNCs on track during machining. Prior to machining, additional options for measuring and setting tool and work planes can reportedly reduce the time and expense associated with fixturing, particularly for complex parts that require six-degrees-of-freedom or other advanced coordinate setups. After the self-correcting machining cycle, the software automatically formats the data into various inspection reports, ranging from GD&T analyses and SPC reports to laser point-cloud-to-CAD model comparisons.
Granted, the software is designed for select applications: namely, those involving parts that are too expensive to scrap and fully represented in CAD. These parts trend large, and large parts can be difficult to move to and from dedicated measuring equipment. As a result, manufacturers might take the risk of continuing machining prior to receiving inspection data rather than accommodate a potentially lengthy delay to remove the part, measure it, and set up the machine again. When the application does justify interrupting machining for a probing cycle, various techniques involving tooling balls, special gages and master gages help to ensure the precision of measurements taken on the same equipment that produced the part.
Other applications might be better suited for different varieties of self-correcting processes. I wrote about one example last year: a system from Marshall Automation America that is designed for high-volume turning of standard parts. It uses a feedback loop between the CNC and a dedicated gaging station to automatically update offsets before tool wear drives parts out of tolerance. The system is particularly useful for statistical process control (SPC).
Another example demonstrates the potential implications of fifth-generation wireless communications technology (5G) on the machine shop floor. One area of interest is mounting sensors directly to workpieces in order to monitor and correct for chatter (self-induced machining vibration) in real time. Whatever the implications of this research, self-correcting machining is likely to expand to more applications as machine shops continue to digitalize their operations.
Related Content
Diving Deeper Into Machine Monitoring Data
Data visualization is the first step in using machine monitoring data, but taking it to the next level requires looking for trends within the data.
Read MoreBeyond the Machines: How Quality Control Software Is Automating Measurement & Inspection
A high-precision shop producing medical and aerospace parts was about to lose its quality management system. When it found a replacement, it also found a partner that helped the shop bring a new level of automation to its inspection process.
Read MoreSwiss-Type Control Uses CNC Data to Improve Efficiency
Advanced controls for Swiss-type CNC lathes uses machine data to prevent tool collisions, saving setup time and scrap costs.
Read MoreHow this Job Shop Grew Capacity Without Expanding Footprint
This shop relies on digital solutions to grow their manufacturing business. With this approach, W.A. Pfeiffer has achieved seamless end-to-end connectivity, shorter lead times and increased throughput.
Read MoreRead Next
Choosing a Five-Axis Machine Tool With Automation in Mind
While much focus is placed on the machinery that moves parts, the features most important for automating five-axis machining are arguably found in the machine tool itself.
Read MoreAdaptive Machining Makes a Robot More Productive
This system for machining and polishing turbine blades shows the value of software for inspection, toolpath calculations and adaptive machining working together.
Read MoreObscure CNC Features That Can Help (or Hurt) You
You cannot begin to take advantage of an available feature if you do not know it exists. Conversely, you will not know how to avoid CNC features that may be detrimental to your process.
Read More







.png;maxWidth=300;quality=90)
.png;maxWidth=300;quality=90)


