What Should Machinists Know About In-Machine Probing?
In-machine probing doesn’t reach the power of CMMs but can still be useful for pre- and mid-process control, as well as for “rough screening” of parts.
Share


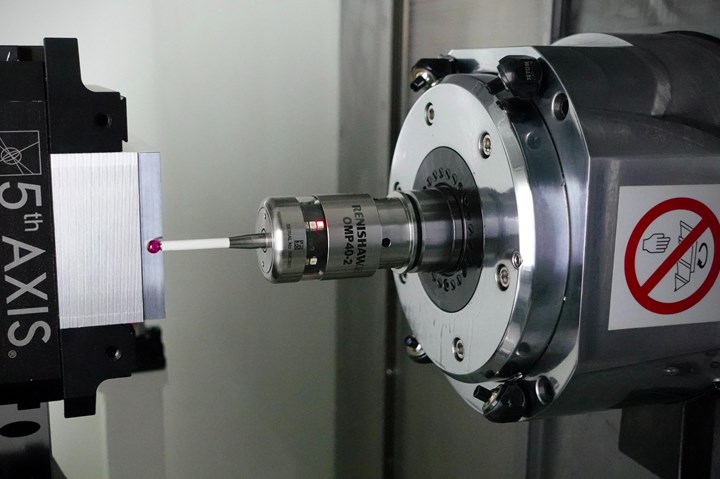
In-machine probing is a great inspection tool, but it cannot replace an overall inspection strategy. Consider in-machine probing a “rough screen” approach compared to a dedicated CMM’s “fine screen” approach.
Photo Credit: Miller's Edge
Reader Question
I’m just starting out and want to learn how to utilize my machine’s probe beyond offsets. What are the best practices for fitting in-machine probing into an overall inspection strategy? Do you only use in-machine probing with automated cutter compensation? Or do you use in-machine probing of critical dimensions to supplement an off-machine sampling plan?
Miller’s Advice
A crucial thing to remember about in-machine probing is that the probe does not make a machine a coordinate measurement machine (CMM). The probe is just a fancy switch, and the machine is measuring itself. By the same token, in-machine probing should serve as a supplement to your overall inspection strategy, not a replacement. Therefore, the things one chooses to measure in the machine, and the tolerance used to check them, should be reasonable.
Machine accuracy and repeatability play a part in the quality and consistency of probed measurements. Also, the machine’s thermal characteristics can determine whether measurements will be repeatable hour to hour. Even assuming the machine is sufficiently accurate and stable, not all features are good candidates for in-machine inspection. Features of size and positions are great candidates for probing, while most of today’s in-machine probes do poorly with tolerances like squareness, flatness or roundness.
Consider in-machine probing a “rough screen” approach compared to a dedicated CMM’s “fine screen” approach. In-machine probes are great for rough screening of parts that are grossly out of spec, but may struggle with measurements that are barely out of spec. A fine screen with the right gauge will be the final confirmation of a good or bad part.
When looking at a probing strategy, there are three areas where probing fits into a process: before, during and after. Probing before the cut is done to fixtures or raw material to set up a process or start one safely. Probing during the cut confirms certain process checkpoints or diagnoses tool life and other problems. Lastly, probing post-cut provides a rough estimate on whether parts are likely good or likely bad.
Machine setup is the most obvious and common use for in-machine probing today. Oftentimes, fixtures may be adequate for clamping but not positioning. In these applications, the probe can help find part-zero or supplement as a hard stop where one can’t be used. When running jobs across multiple shifts, or utilizing operators of varying skill, the probe can be used as a Poka Yoke and stop the process from cutting a misloaded part. If the raw material is not ideal — such as with weldments, poor saw cuts or the like — the probe can be used to adapt to the work piece and add additional roughing passes if needed, or slow down initial passes to handle the increased load.
The second most common use of in-machine probes is for offset adjustments in the middle of the process. This is a closed loop process where a part is milled and checked, the tool is adjusted accordingly, and the part is cut again and checked again. Borrowing from pre-cut probing’s themes, we may fear part movement in difficult applications or during intensive roughing. The probe can re-confirm the position of the part or clamps, stopping the process if danger exists. It can also assist with capturing thermal drift and compensating for it in operations with tight tolerances.
Probing after the cut can utilize any of the above strategies, but can also easily morph into “CMM” territory. Isolate the customer’s most critical dimensions and only check these. Measurements beyond these likely waste spindle time for the next cycle or job. One smart approach for probing after the cut is to bracket the process. This involves probing a feature completed early in the cycle, and one finished late in the cycle. This rough-screen approach can designate a full part as likely good or likely scrap, or determine if a problem occurred mid-cycle.
It’s worth mentioning that the full potential of probing is limited to the shop’s ability to do macro-programming. However, with the right investments in training, this can be easily solved. Stick to the things a probe is good at, identify where in the process makes the most sense for additional probing, and recognize that probing’s potential is only limited to your creativity.
Want Miller’s help solving your machining challenges? John Miller, owner of Way of the Mill CNC training and consulting, will use his machining expertise to answer a reader-submitted question in his column each month. Submit your question here!
Related Content
A 100-Year-Old Measurement Tool That is Still Used Today
The reed mechanism was a breakthrough in high-precision measurement and is still used today for sub-micron or even nanometer resolution applications.
Read MoreUnderstanding New Surface and Profile Standards
Standards for surface finishes and profiles are not static; they change as technology changes or new processes come along that need to be considered.
Read More4 Ways to Establish Machine Accuracy
Understanding all the things that contribute to a machine’s full potential accuracy will inform what to prioritize when fine-tuning the machine.
Read MoreUsing Digital Tap Testing to Measure Machining Dynamics
Tool-toolholder-spindle-machine combinations each have a unique vibration response. We can measure the response by tap testing, but we can also model it.
Read MoreRead Next
How to Tackle Tough Angled Pocket Milling With Two Tools
Milling a deep pocket with a tight corner radius comes with unique challenges, but using both a flat bottom drill and a necked-down finishing tool can help.
Read MoreReducing Machine Cycle Times Both In and Out of the Cut
Increasing automation means setup times are lower than ever. How can shops optimize cycle times to match and win more business?
Read MoreOEM Tour Video: Lean Manufacturing for Measurement and Metrology
How can a facility that requires manual work for some long-standing parts be made more efficient? Join us as we look inside The L. S. Starrett Company’s headquarters in Athol, Massachusetts, and see how this long-established OEM is updating its processes.
Read More


