Automated Laser Scanning Using a Collaborative Robot
This device is said to be the first programmable laser scanning system to enable automated 3D scanning, dimensional measurement and dimensional gaging leveraging a collaborative robot platform.
Share


Manufacturers are increasingly integrating automated processes. For machine shops, this is commonly exemplified in the form of robots loading/unloading CNC mills, lathes and so on. In fact, recent advances in collaborative robot technology, that is, robots that can safely operate alongside shopfloor employees without protective fencing, are opening up opportunities for shops to apply automation in new ways.
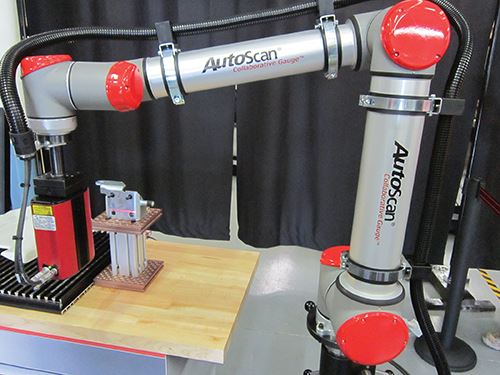
Perceptron, manufacturer of a range of industrial metrology equipment, brings the collaborative robotics concept to automated part inspection and gaging with its AutoScan Collaborative Gauge, which I discovered at a recent open house at Exact Metrology in Cincinnati, Ohio. Keith Mills, Perceptron’s vice president of global marketing, says AutoScan is the first programmable laser scanning system to enable automated 3D scanning, dimensional measurement and dimensional gaging leveraging a collaborative robot platform.
The AutoScan is an alternative to conventional manual laser scanning devices in which users continuously maneuver the laser across the surface of a part like they’re “painting” it. Conversely, the programmable, collaborative robot platform enables automated part scanning routines to be performed alongside shopfloor employees sans the safety infrastructure that’s required for conventional robots.
The system’s three primary components are the collaborative robot, Perceptron’s Helix 3D laser scanning sensor and its Vector software. The scanning sensor is mounted to the arm of the six-axis robot, which uses built-in force-sensing technology that causes it to stop its movement if it makes contact with a person (rated to the ISO 10218-1:2011 safety standard for industrial robots). The AutoScan has a robot reach radius of 1,300 mm and sensor standoff of 200 mm (larger work areas are available), offering a rigid, fixed mount or optional mobile stand to enable it to be deployed in different areas of a shop as needed.
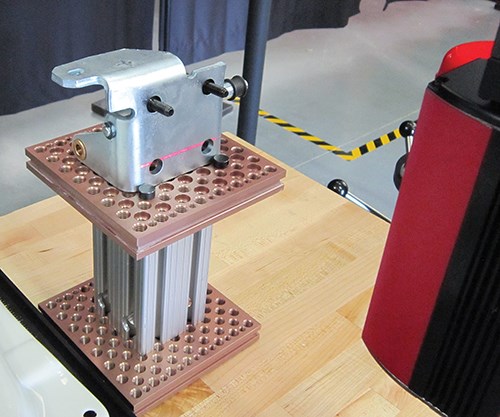
The Helix laser scanner uses MEMS (micro-electro-mechanical systems) solid state optical technology, and all workpiece feature scanning is performed with the multi-axis robot in a static position. Mr. Mills says that with this approach, the robot is used purely as a positioning device for the end-of-arm laser scanner. That way, potential measurement errors due to robot acceleration and possible robot structure deflection, for instance, aren’t introduced into the scanning process.
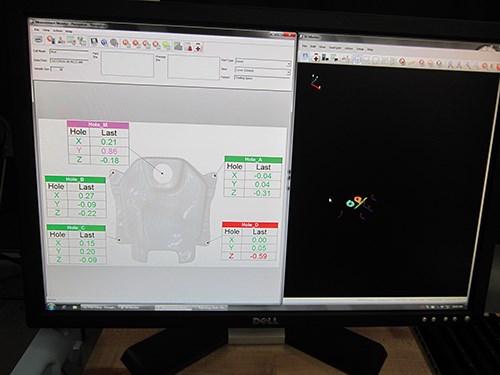
The Helix scanning sensor uses a Class 2M laser to capture a 3D digital representation of the part and reports complex form and surface deviations relative to the part’s CAD model, together with discrete information for critical features such as holes, slots and studs. Self-teach capability enables robot movement to be programmed manually by moving the robot to each scanning position. All robot moves are then automatically written to the part inspection program to enable subsequent parts to be inspected automatically. Extensive metrology experience is not required to program or use the device, Mr. Mills says.
As many as 200 scan lines per feature can be programmed with automatic feature extraction from the generated point cloud dataset, enabling multiple features to be inspected with the robot in a static mode. The configurable laser line density enables scan line intervals to be defined as small as 0.1 mm, and laser line length and orientation of ±45 degrees is said to be easily programmed.
Vector analysis and reporting software offers real-time status monitoring, showing immediate results via a measurement monitor, tolerance limit alarms and a one-shot view of part trending. It also offers an SPC reporting package with historical database for traceability, data analysis for process improvements and remote access to inspection results. The software features comprehensive geometric dimensioning and tolerancing (GD&T) capabilities as well as a self-teaching “Autosolve” feature extraction based on feature type for measurement of holes and studs, for example.
Related Content
Addressing Manufacturing Challenges with Automation
GrayMatter Robotics’ Physical AI robotic cells for manufacturing offer immediate impact and results.
Read MoreAerospace Shop Thrives with Five-Axis, AI and a New ERP
Within three years, MSP Manufacturing has grown from only having three-axis mills to being five-axis capable with cobots, AI-powered programming and an overhauled ERP. What kind of benefits do these capabilities bring? Find out in our coverage of MSP Manufacturing.
Read More4 Manufacturing Trends That Cannot Be Ignored
The next five years will present their own unique set of challenges, and shops can alleviate them by embracing these technologies and trends.
Read More3 Ways Artificial Intelligence Will Revolutionize Machine Shops
AI will become a tool to increase productivity in the same way that robotics has.
Read More


