How to Anticipate Machining Errors before Parts Are Scrapped in QA
In L&S Machine's system for data-driven manufacturing, the data describe a good day.
Share


Does the future have to look futuristic? Do its systems have to perform in a complex way?
Questions like these are germane to many of the topics most relevant to the advance of manufacturing today. Take “automation,” for example. The idea is often associated with robots and entirely unattended processes. But too much bias toward that association might leave a shop overengineering its automation solution, undervaluing the many opportunities to automate that are simpler than a sophisticated system.
And “data-driven-manufacturing” falls into that category as well.
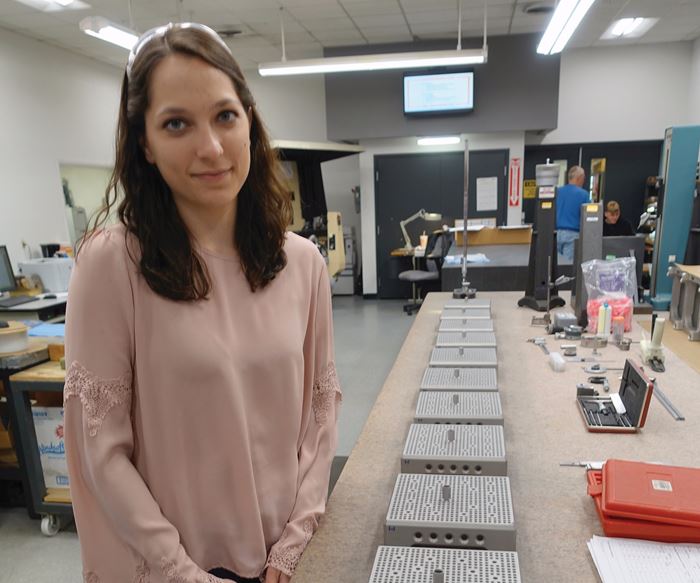
Lauren Morlacci knows this. She is an industrial engineer with L&S Machine Co. in Latrobe, Pennsylvania, a job she earned immediately after college in part thanks to her success with a team of other University of Pittsburgh students who helped L&S develop a data-driven manufacturing system. This system saves cost for this machining business by using data at the machine tool to predict potential machining errors before they occur, avoiding the danger of expensive parts being scrapped because of problems discovered after machining in Quality Assurance (QA).
In pursuing this aim, there is no shortage of data at the machine tool that might be used. Indeed, she says, “It was intimidating to look at all the data and know where to begin.” Of all the measurements that could be captured at the machine and all the conclusions they might suggest, what trends and what markers were really valuable? How could the shop respond to the right data, and respond to changes quickly enough to make meaningful and effective process corrections?
L&S itself had struggled with questions like these for years. According to company President Rob DiNardi, a previous engineering team from a different university did not deliver a workable solution, but the failure was on L&S rather than this team. “We told them what we thought a data-driven solution would consist of,” he says, and that imagined solution was too complicated. It involved finding statistical trends and linking those trends to likely errors and needed corrections.
Ms. Morlacci’s group was then the second engineering team working with L&S on this problem, and her group was given the luxury of a more open range of possibilities as to how to employ the data, and how even to understand what it is that the data show.
The realization she and her teammates ultimately came to in conjunction with L&S provided the solution that is now succeeding for this shop, the solution that might even offer the potential to eliminate QA inspection once it is extended to a subsidiary shop that L&S owns. What Ms. Morlacci, Mr. DiNardi and the staff of L&S realized is that the data potentially provide simply a picture of what good performance looks like, what a good day at the machine looks like. And that picture alone can be enough.
QA Is Too Late
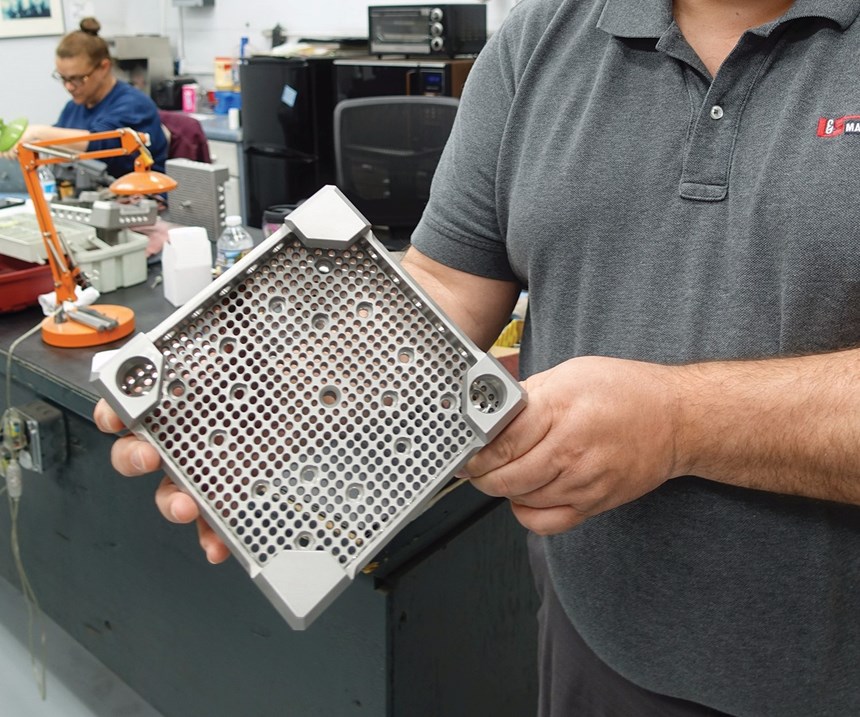
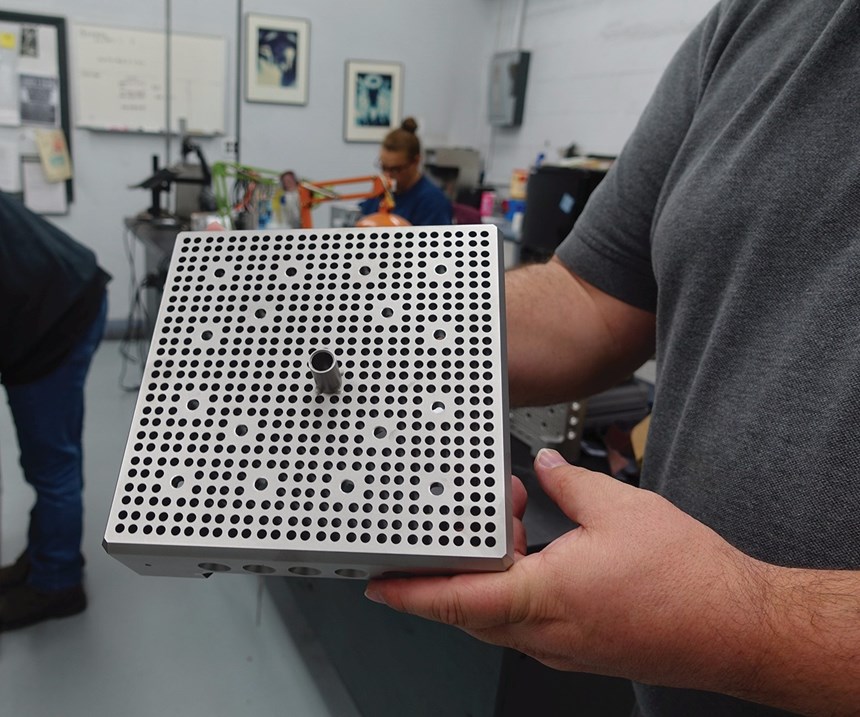
L&S is a contract shop serving the nuclear power industry. Its principal product, accounting for about 80 percent of business, is fuel nozzles supporting the fuel rods within nuclear reactors. These box-shaped parts with many machined features are milled on five-axis machining centers out of 304 stainless steel. L&S ships about 2,500 of them per year.
The problem Mr. DiNardi has long seen in processing these parts relates to QA. Specifically, the problem is the fact that many machining errors have been discovered only in QA inspection, which is too late. A dimensional error discovered here generally cannot be corrected. Instead, the part is scrapped, sacrificing about $1,500 of work and $1,000 of material.
Even worse is the possibility of a problem making it through QA. That happened one time, Mr. DiNardi says. In 2011, one fuel nozzle with a machining error slipped past L&S’s process, resulting in a fuel rod being misaligned in service. The problem was discovered when this misalignment occurred. That is, the problem was discovered in use almost immediately, and the faulty part was replaced. Even so, the Nuclear Regulatory Commission became involved, visiting the shop to investigate what had happened. The mistake was an aberration, but it revealed to L&S that even a rigorous QA system is not flawless. Mr. DiNardi therefore became even more determined to augment after-the-fact inspection for catching errors with in-process controls that are able to detect potential errors.
What kinds of errors are these? Jason Smathers is the company’s manufacturing manager, a position that has made him very aware of the range of variables that might go wrong in a machining process. Most of the potential problems are mistakes the company has learned to catch over the years, he says. For example, probing routines check to ensure that parts have been loaded correctly. But other errors result from microscopic changes rather than macro-level mistakes. An adjustment made to the machine’s position in the morning, when the machine is cool, might lead to an error as the spindle runs warmer through the day. Then there is tool wear, a small change that might cause a process running close to tolerance to tip over the edge into error. These changes are gradual; in the course of a minute or even the course of an hour, they move too slowly to detect. But still, there is some moment at which these changes become pronounced enough that they begin to affect the process. The errors resulting from these effects develop within the trend of part dimensions before a tolerance is actually broken. Thus, Mr. DiNardi’s recurring question to Mr. Smathers over the course of years has been, “Why couldn’t we know that part was out of spec before it got to inspection?”
Getting to Simple
Mr. DiNardi has a context for asking this question. Earlier in his career, before he owned a manufacturing business, he worked for the Marshall Space Flight Center in Huntsville, Alabama. When a spacecraft is launched, this facility uses data to monitor the performance of its components. Real-time trends in the data describing a component’s performance allow engineers on the ground to predict when a component is approaching failure, before that failure occurs. So why couldn’t similar real-time analysis aid a machining process? He began searching for the way to realize this possibility about eight years ago.
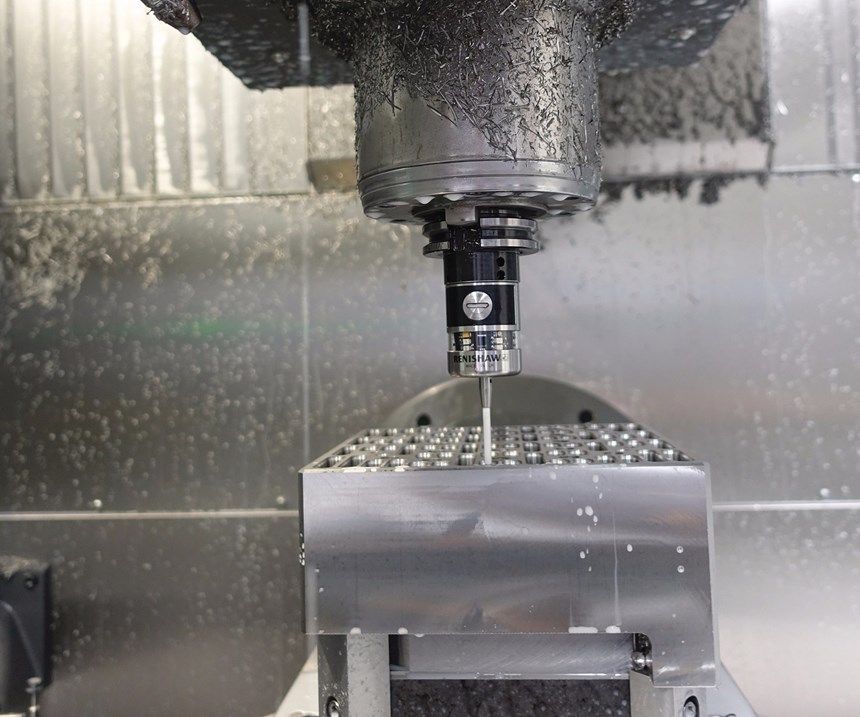
Step one was to get the data. The Renishaw machine tool probe employed by each machining center was the means for doing this. The shop began using these probes for automatic, on-machine measurement of various critical features of each fuel nozzle part, adding about five minutes of probing to every machining cycle. But the probing capabilities of the machines themselves allowed only for a momentary determination of whether a given feature was in or out of tolerance. There was no way to capture a data record over time and look for trends. At first, L&S shop personnel were manually recording data in order to develop this record.
The manual recording ended when FactoryWiz machine monitoring software from Refresh Your Memory eliminated the need, collecting data automatically so it could be analyzed later. But even with this improvement, the problem that remained was contained in that word “later.” In one case, the data revealed that a certain tool needed to be changed after 16 parts. The data also revealed that taking a certain cut at 0.001 inch under nominal was counterproductive, as 0.001 inch over nominal actually delivered a better process capability index (Cpk). Yet the more specific and compelling problem of a part being scrapped because of one small variable that just happened to go wrong remained beyond the reach of this analysis.
A team from a large, well-known manufacturing company visited the shop during this time. The members of this team had gotten no further within their own data-driven processes. They, too, analyzed data after the fact. They had mathematicians looking for predictive trends.
Learning this, Mr. DiNardi looked toward the same approach. He thought a team of industrial engineering students might be able to help determine which trends in the data were significant. He even had monitors installed near each machine in preparation for the operators beginning to watch the data and respond to significant trends. But this solution, the complicated solution, simply didn’t gel.
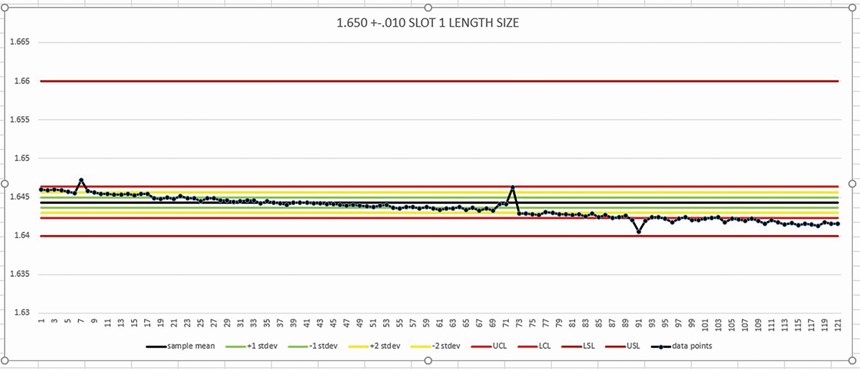
The simpler solution that Ms. Morlacci and her team later came to amounted to this: In a sense, forget the mathematics. Forget the statistics—or at least, forget the idea of predictive models based on statistical trends. Instead, recognize that the probing data for a span of parts that all successfully went on to pass inspection provide a picture of a process performing well. The uncertainty of the on-machine probing measurements means that the probed measurement for a given machined feature invariably has to fall well within the tolerance band for that feature to assure it will pass inspection later at the coordinate measuring machine. Therefore, this picture of a process performing well at the machine tool consists of data that adhere to a tighter range than the acceptable range in QA. The relationship between probe measurements and specific process variables might still be unknown, but the probe measurements can provide a trip wire indicating that something significant in the process is beginning to change in an adverse way.
Using the probe data in this way—that is, as a picture of good performance at the machine, a probe-measured predictor of likely success—has enabled Ms. Morlacci to develop an on-machine tolerance band around each feature to determine when that feature is likely to pass inspection later. Now, in the probing routines at the machining centers, each feature essentially has two tolerance bands. The first tolerance band describes whether the feature is in or out of specification. If the latter, the process stops. The second, tighter tolerance band indicates whether the feature is trending out of specification, or departing from the performance of a good day. If it is, the operator is alerted, he gets either Mr. Smathers or Ms. Morlacci to come assist with diagnosing the problem, and meanwhile, the process keeps running.
The process keeps running. That part is key. Catching errors before they occur requires catching errors well before they occur, while there is still time to diagnose the problem and respond. Mr. Smathers or Ms. Morlacci’s first response, when being told that a process has broken out of its range of previously established “good” probing measurements, is typically to let that process keep running with no changes. Will the trend continue? How quickly will it advance? Seeing this helps them in their educated guess as to what the cause might be and how big of a correction to make.
L&S’s primary customer for nuclear components strongly approves of this process and would like to see it go further. That is, the customer would like to see a process that initiates a response to the data automatically, without human beings having to make a response. This would be a more tightly closed-loop process, and a more advanced, futuristic response to the challenge of repeatable machining. But the problem is this, says Mr. DiNardi: Errors don’t happen often enough. For all of the sources of error that happen even somewhat frequently, the shop has already developed a safeguard within its process, such as probing catching setup mistakes. The infrequent errors are what remain. At a certain point, a human making a judgment really is the most efficient and least trouble-prone way to proceed.
Can QA Go Away?
That customer’s endorsement is arguably the most important benefit of this system. L&S’s successful application of probing data has not only reduced discoveries in QA that lead to scrap, but it also provides greater control within an application where the potential risks associated with a nonconforming part are serious.
An added benefit: By establishing confidence in advance that a part has been machined accurately—that is, by essentially knowing the part is accurate while it is still being machined—L&S has been able to eliminate the step of measuring a part to check each new lot. In the past, an operator was often left waiting for an hour or more while he attained this process validation. Today, this check that pauses production is no longer needed.
QA itself will not go away, Mr. DiNardi says. This is the nuclear industry, and compliance with regulation requires formal QA inspection of the part no matter how much is known about the process that produced it. Thus, for L&S, there is only so far that the data analysis can go.
But L&S also owns another shop. In 2015, for the sake of diversification, the company acquired a machine shop in California serving aircraft and semiconductor manufacturers. For many of the parts machined here, formal regulation related to QA does not exist. Thus, this data-analysis system developed to safeguard valuable parts in the nuclear industry might actually go much further in this other shop. For certain parts machined out west, Mr. DiNardi expects that the company might indeed do away with post-process inspection altogether.
Related Content
Measuring Torque, Thrust Force for Smart Drilling Operations
To monitor drilling operations for smart manufacturing solutions, torque and thrust force can be measured.
Read MoreMore Surface Finish Parameters at Hand
Measuring surface finish at the point of manufacture is often done by the same machinist who is manufacturing the part. They need tools that meet test requirements and are easy to use.
Read MoreMarathon Precision’s Engineering Playground: One Shop’s Secret to Sustaining High Tech, Low-Volume and High Morale
Half an airplane on the wall, a ten-foot metal dragon, and a full-blown recording studio might not scream “manufacturing efficiency,” yet Marathon Precision proves otherwise. Here’s how forging, complex CNC operations and staff-driven creative projects combine to fuel the shop’s productivity and profitability.
Read MoreBallbar Testing Benefits Low-Volume Manufacturing
Thanks to ballbar testing with a Renishaw QC20-W, the Autodesk Technology Centers now have more confidence in their machine tools.
Read More




.png;maxWidth=300;quality=90)


